利用 Mark Magic 将 Joplin 笔记发布为 Hexo 博客
Refer to Mark Magic, Hexo
Introduction
Mark Magic 是一款可以将来自于一些常用笔记软件的文件数据转化为目标软件 markdown 笔记的工具。 我们可以利用它来将 Joplin 中的笔记导出,随后使用 Hexo 生成网页并发布
Setup
需要保证 Joplin Web Clipper 功能打开,可在Joplin 软件中 Tools -> Options -> Web Clipper 处打开。
Mark Magic 要求 Node.js® version must >= 20
Mark Magic
请参考官方文档 Mark Magic, 其给出了详尽的说明与范例。此处以 Joplin 与 Hexo 为例,权且做个记录:
为 Mark Magic 新建文件夹
在此目录下打开命令行,输入以下命令:
1
npm i -D @mark-magic/cli @mark-magic/plugin-joplin @mark-magic/plugin-hexo
安装完毕后,我们在此目录中手动添加
mark-magic.config.yaml文件1
2
3
4
5
6
7
8
9
10
11
12
13
14# mark-magic.config.yaml
tasks:
- name: blog
input:
name: '@mark-magic/plugin-joplin' # Input plugin to read data from Joplin notes
config:
baseUrl: 'http://localhost:27583' # The address of the Joplin web clipper service, usually http://localhost:41184. Here, we are using the development address http://localhost:27583 for demonstration purposes.
token: '5bcfa49330788dd68efea27a0a133d2df24df68c3fd78731eaa9914ef34811a34a782233025ed8a651677ec303de6a04e54b57a27d48898ff043fd812d8e0b31' # The token for the Joplin web clipper service
tag: blog # Filter the notes based on a tag
output:
name: '@mark-magic/plugin-hexo' # Output plugin to generate the files required by Hexo
config:
path: './' # The root directory of the Hexo project
base: /joplin-hexo-demo/ # The baseUrl when deployed. By default, it is deployed at the root path of the domain. It should match the `root` configuration in the hexo _config.yml file.命令行中输入
npx mark-magic运行插件完毕
Hexo
Hexo 是一款静态博客生成器,其可以将 markdown 文件转换为 html 网页。
安装hexo
1
npm install hexo-cli -g
在空文件夹中,初始化hexo
1
hexo init
注意,在win中,这一步可能会遇到
hexo.ps1 cannot be loaded because running scripts is disabled on this system. For more information的报错,请在系统设置中Turn on these settings to execute PowerShell scripts调整 package.json
1
2
3
4
5
6
7
8
9
10
11
12
13
14
15
16
17
18
19
20
21
22
23
24
25
26
27
28{
"name": "hexo-site",
"version": "0.0.0",
"private": true,
"scripts": {
"build": "hexo generate",
"clean": "hexo clean",
"deploy": "hexo deploy",
"server": "hexo server"
},
"hexo": {
"version": ""
},
"dependencies": {
"hexo": "^7.0.0",
"hexo-abbrlink": "^2.2.1",
"hexo-deployer-cos-cdn": "^1.7.1",
"hexo-generator-archive": "^2.0.0",
"hexo-generator-category": "^2.0.0",
"hexo-generator-index": "^3.0.0",
"hexo-generator-tag": "^2.0.0",
"hexo-renderer-ejs": "^2.0.0",
"hexo-renderer-marked": "^6.2.0",
"hexo-renderer-stylus": "^3.0.0",
"hexo-server": "^3.0.0",
"hexo-theme-landscape": "^1.0.0"
}
}选择主题,并按照主题要求安装,以icarus为例
1
2
npm install hexo-theme-icarus
hexo config theme icarus测试启动hexo
1
2
hexo g
hexo s配置
_config.yml与_config.icarus.yml文件添加备案信息
在
.\node_modules\hexo-theme-icarus\layout\common下footer.jsx文件
写入:1
2
3<p class="is-size-7">
<a href="https://beian.miit.gov.cn/" target="_blank" rel="noopener"></a>苏ICP备XXXXXXXX号-1</a>
</p>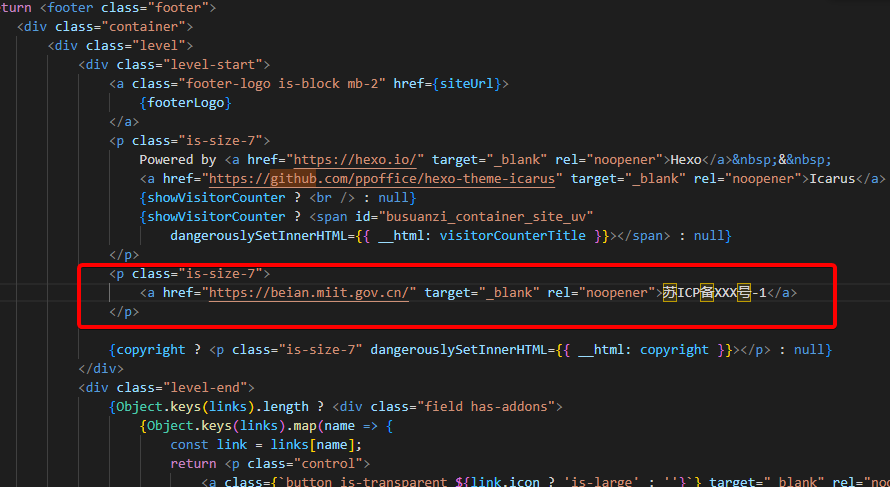
设置图片居中
参考Hexo博客主题之Icarus的设置与美化(进阶)的方法,打开Icarus主题文件夹,通过相应路径
source/js/main.js,找到main.js修改如下。1
2
3
4
5
6
7
8
9
10
11
12(function ($) {
$('.article img:not(".not-gallery-item")').each(function () {
// wrap images with link and add caption if possible
if ($(this).parent('a').length === 0) {
//修改部分
$(this).wrap('<a class="gallery-item" style="display:block;text-align:center;" href="' + $(this).attr('src') + '"></a>');
//修改部分
if (this.alt) {
$(this).after('<div class="has-text-centered is-size-6 has-text-grey caption">' + this.alt + '</div>');
}
}
});
.bat
1 | @echo off |