Notes of the calibration of MultivewX_Perception(CalibrateTool)
WHAT IS NEW!!
支持利用数据集文件夹中 calibrations 中的标定数据与 datasetparameters.py 中的 NUM_CAM MAP_HEIGHT MAP_WIDTH OverlapUnitConvert OverlapGridOffset 参数给出其相机姿态和视野范围。
例如,当我们希望为 Wildtrack 数据集产生 Overlap view 时:
在命令行中输入 -view D:\Wildtrack ,注意需保证其calibrations文件夹下有extrinsic与intrinsic文件夹(与Wildtrack格式一致)。
运行可得下列结果。
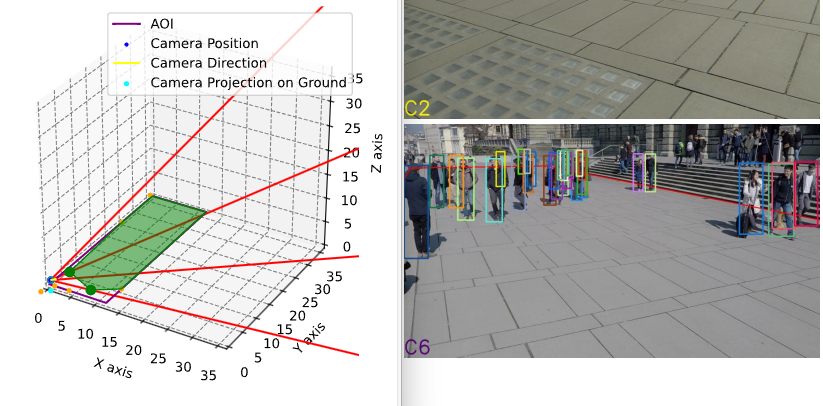
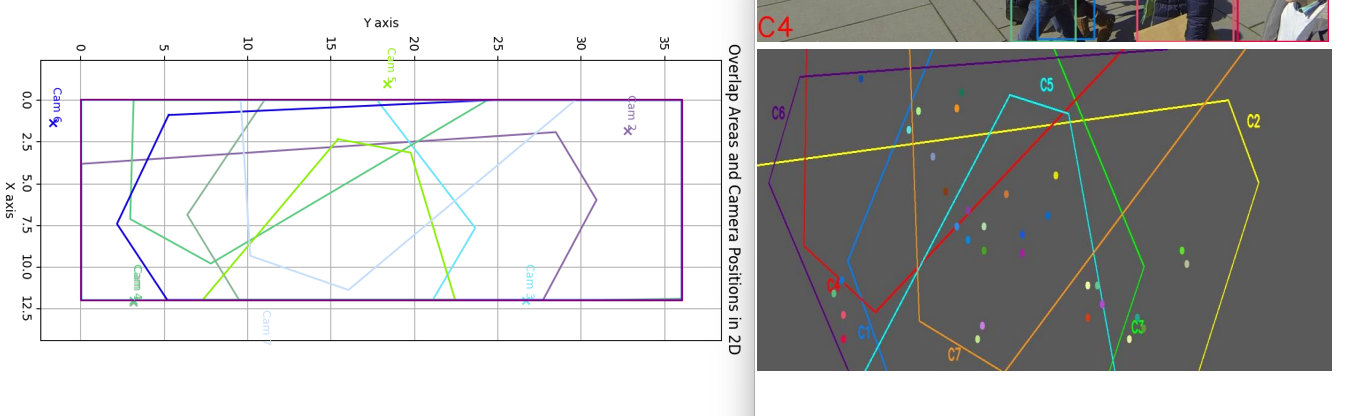
注意:请修改上述的五个参数以符合实际情况,MAP 使用的单位应当与其 calibration 使用的单位相同。Wildtrack 数据集工具声明其网格起点与世界原点并非同处,网格起点为(-300,-90,0)cm,似乎有误。此处使用的是网格起点为(-300,-900,0)cm
Args
MultiviewX_Perception可以接受命令行参数,从而用户可以快速高效地产生数据集。当未接收到相关参数时候,不会启用相关功能。
-a :Annotate and show the bbox on the first frame of each camera or not.
-s :Save the bbox on the first frame of each camera or not.
-k :Keep the remains of Perception dataset or not.
-f :Force calibrate and generate POM, regardless of perception.
-p n: Provide preview for the front n frames. ex. -p 5 will provide 5 frames to preview
-v :Generate Overlap view for the dataset
-view path :Generate Overlap view for the specified dataset, there should be folder calibrations in the given path. ex. -view D:\Wildtrack
例如,当只想借助CalibrateTool进行标定时,可以输入-f,程序会跳过处理percetion数据步骤,也不会进行后续标注的环节。
1 | python run_all.py -f |
Keep in Mind
CalibrateTool 现在是 WildPerception 的标定部分
Github 项目地址:MultiviewX_WildPerception
欢迎下载示例文件:sample.zip
对于场景:
Unity长度(米)➗ Scaling = OpenCV长度(米)
(Unity点坐标 - Unity中GridOrigin的Unity坐标)➗Scaling , 再交换Unity坐标中的y,z分量,可以得到OpenCV下点坐标。
GridOrigin所在位置是OpenCV下的坐标原点
棋盘会在黄色辅助正方体内随机生成,辅助正方体的边长等于两倍的
tRandomTransform,其中心是chessboardGenerateCenter场景中全体
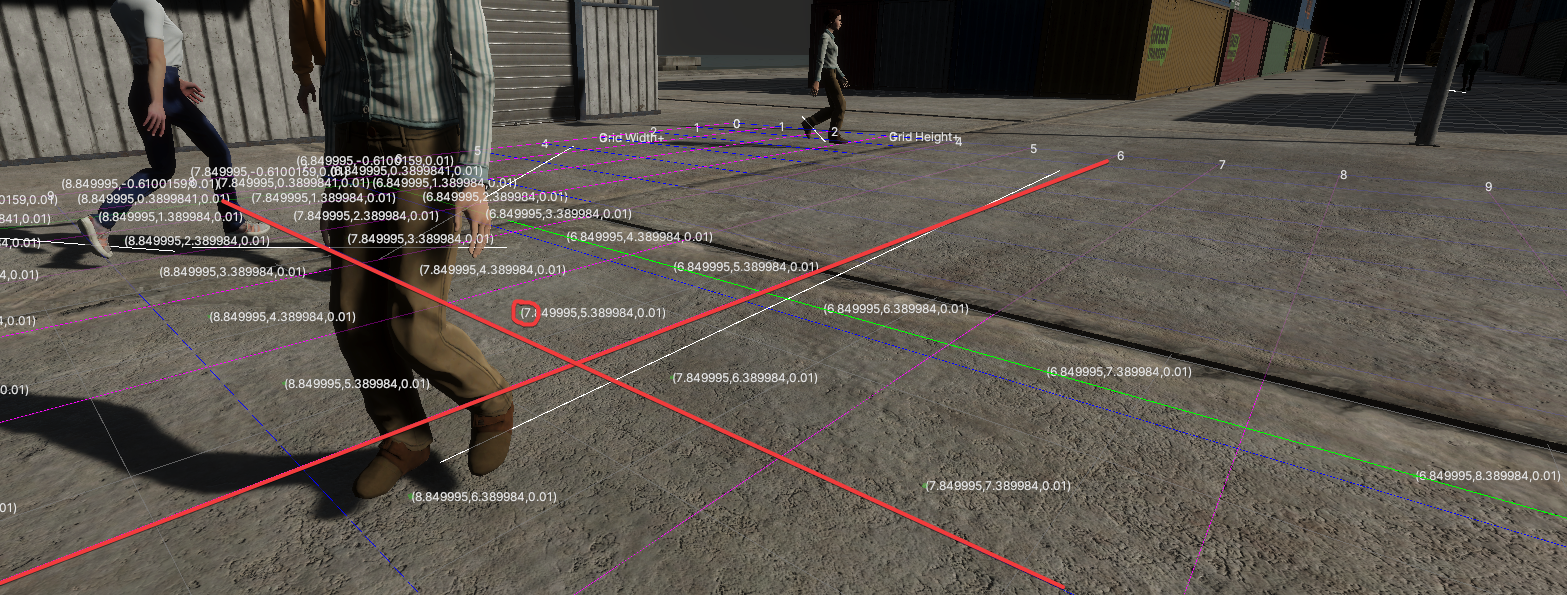
markpoint_3d由chessboardGenerateCenter的坐标加上一些预设的偏移得到。换言之,场景其实只有一份markpoints_3d,其中心为chessboardGenerateCenter,均匀分布在水平面上。注意:Grid辅助线上标注的和辅助点
markpoint_3d上标注的值已经是OpenCV下此点的坐标。如下图:
对于每个相机:
既然整个场景公用一份
markpoints_3d,为什么每个相机下都有markpoints_3d.txt这么个文件呢?因为不是全体
markpoint_3d都在此相机的视野范围内,需要针对每个相机进行剔除对应点。每个相机的markpoints_3d.txt与markpoints_2d.txt共同得出了其外参。务必保证Game View下的分辨率与CalibrateTool配置的分辨率相同,否则会直接退出运行并报错。
tRandomTransform的选择推荐是,使得黄色辅助正方体大部分在所有相机的视野中。
Introduction
CalibrateTool是一个在Unity3D中为一个或多个相机,产生多个虚拟的不同角度朝向的棋盘格数据且给出待标定相机对应内外参的工具。其生成的虚拟棋盘数据等效于利用OpenCV中cv.findChessboardCorners所产生的结果。同时,CalibrateTool 可以完成一些运行 MultiviewX_Perception 所需要的设置,诸如设置地图大小、地图格点起始位置等。具体使用在 [Work with MultiviewX_Perception](# Work with MultiviewX_Perception) 标题下。
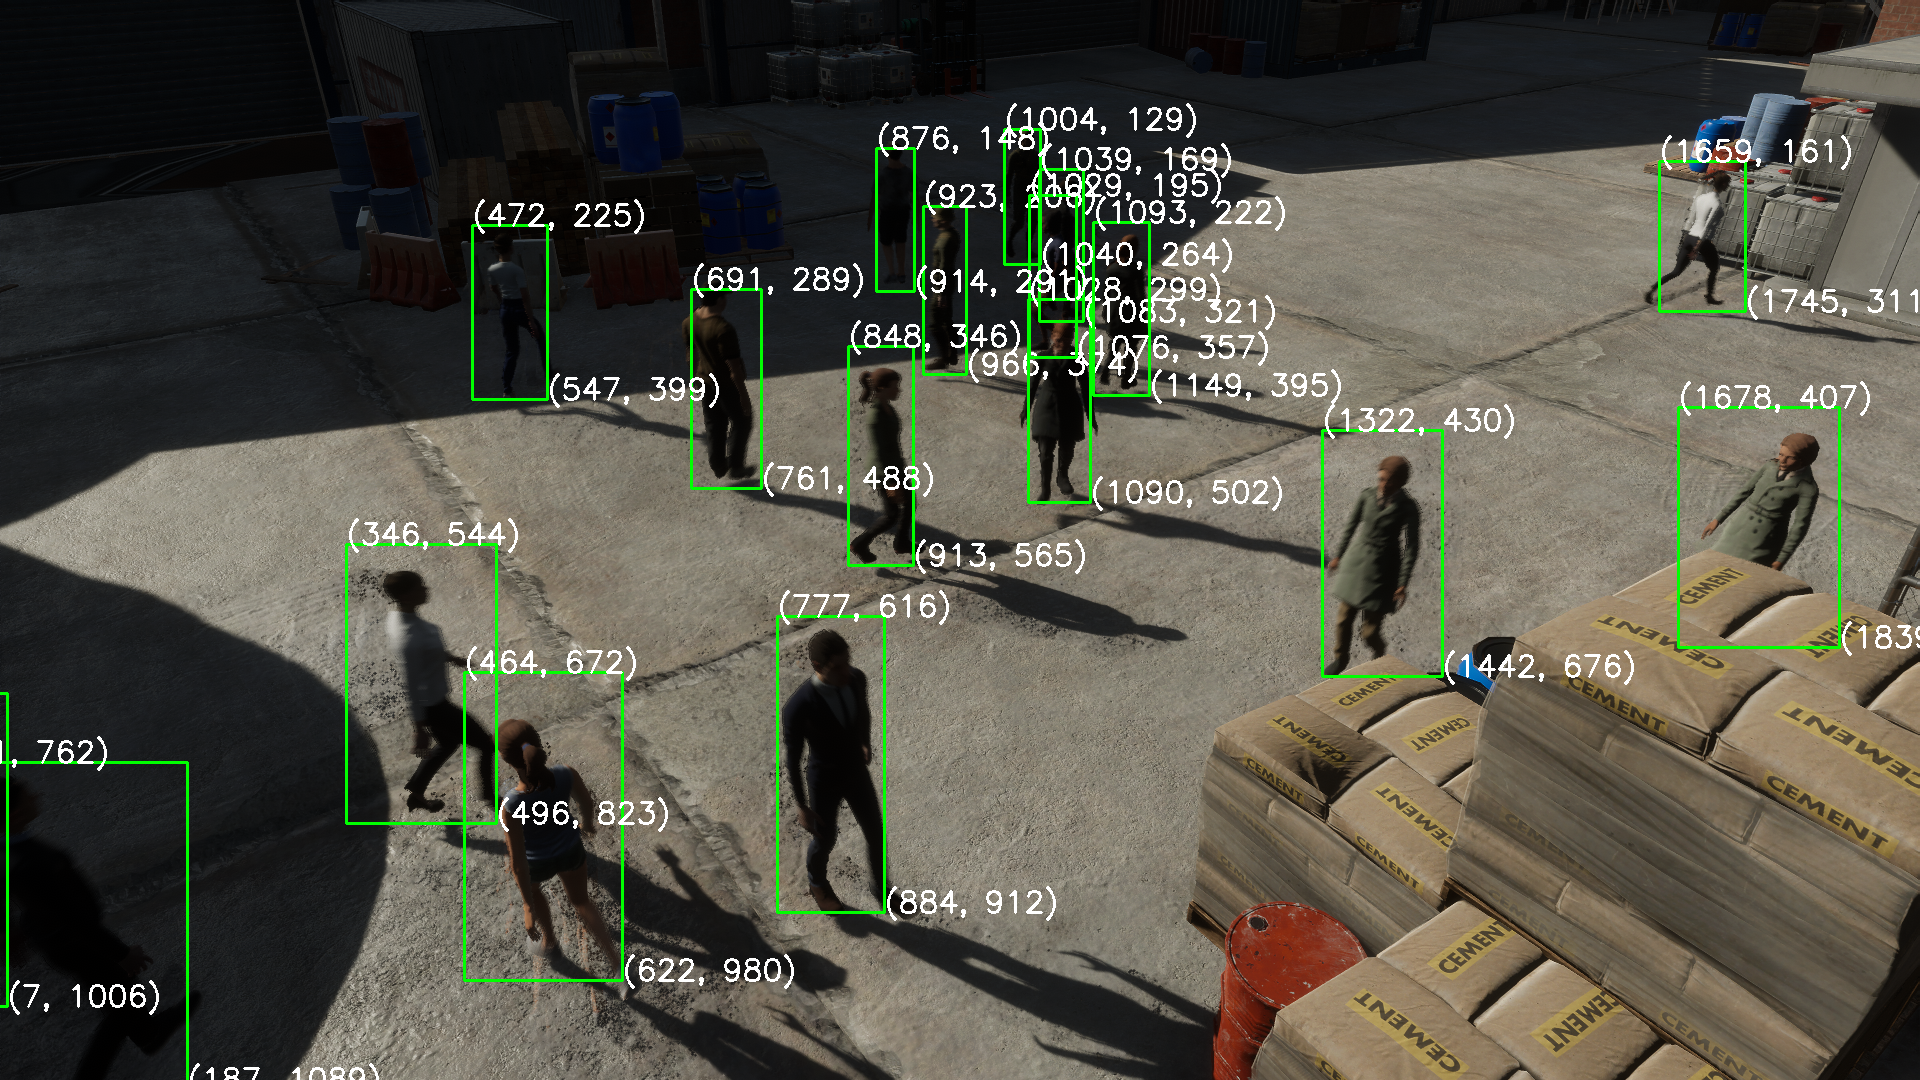
下列图片为标注环节的效果演示,此环节不在CalibrateTool能力范围内,是MultviewX_Perception的后续环节。此处贴上标注的图仅仅用来说明CalibrateTool的缩放、OpenCV坐标系的设置、标定是合理有效的。
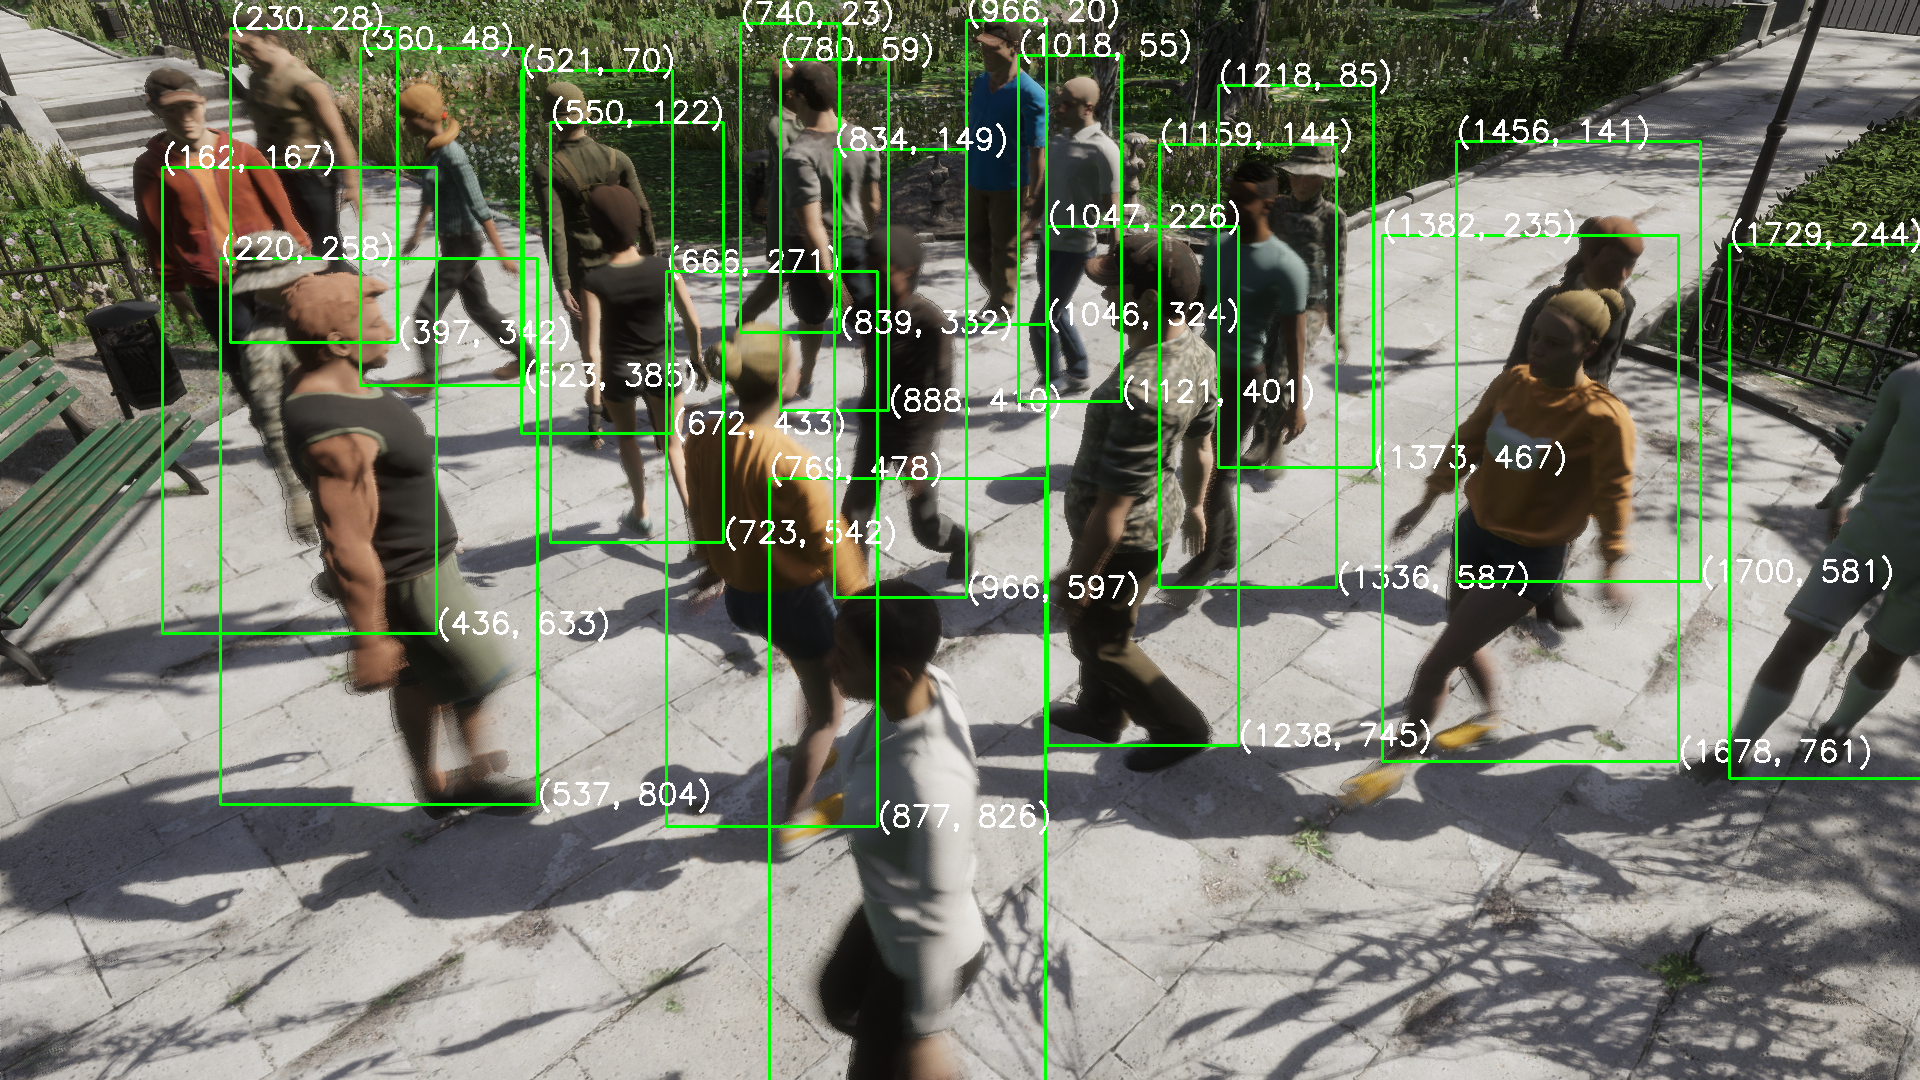
Setup
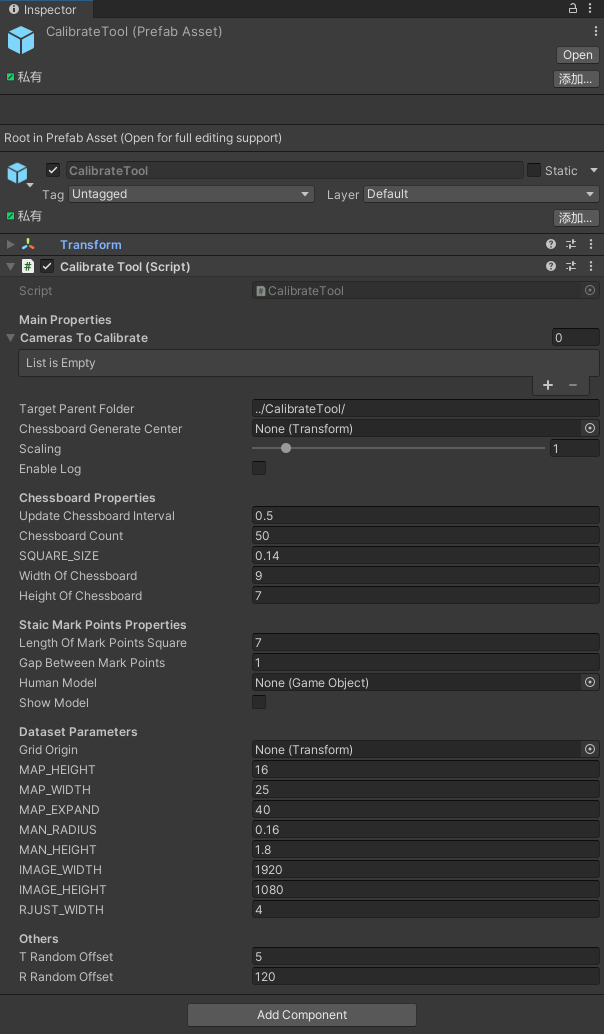
CalibrateTool.unitypackage 是对应的Unity资产,其中包含了一个带有CalibrateTool组件的预制体和组件对应的代码。(面板可能因为版本不同略有出入,推荐总是使用最新的一个版本)
unitypackage包导入完成后,我们可以将 CalibrateTool 拖入到需要标定的场景中:
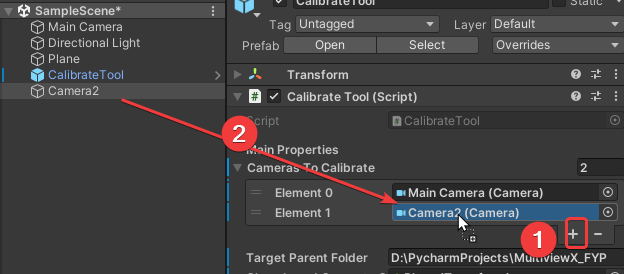
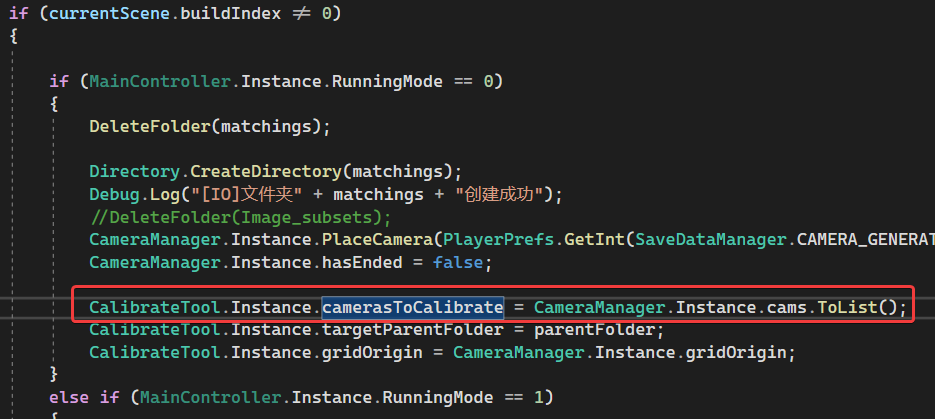
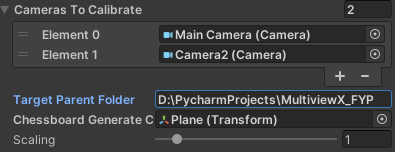
根据自己项目的情况进行配置,点击加号➕,产生空槽,将场景中需要标定的相机拖入,一个或者多个均可,同时,此字段是公开的,可以利用脚本进行赋值:
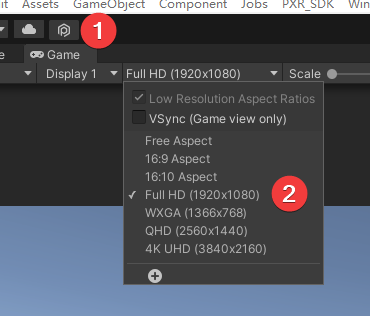
调整相机分辨率,点击Game,选择一个具体的分辨率,此处以1920*1080为例
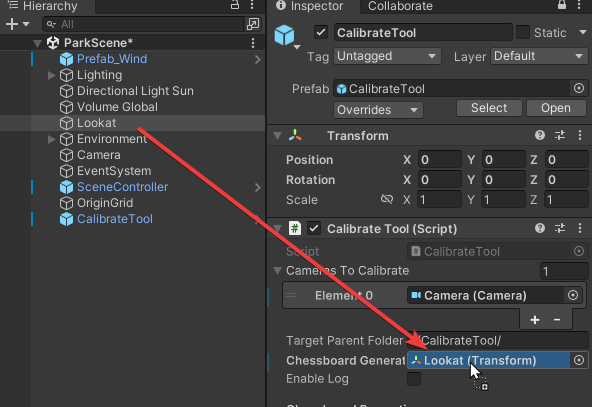
传入一个Transform,chessboardGenerateCenter,用来指示虚拟棋盘的产生位置,同时也规定了标定参照的水平面,这个 Transform 的位置最好能在所需标定的相机的屏幕中央附近(此处为了演示此位置,创建了一个cube,实际使用中只需要创建一个空物体,传入Transform即可,不必考虑其旋转,将被统一清零):
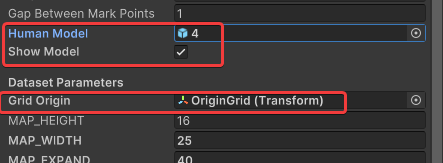
给定目标文件夹,CalibrateTool会在此文件夹下产生一个 calib 文件夹用来保存数据。一般会填入MultiviewX所在文件夹
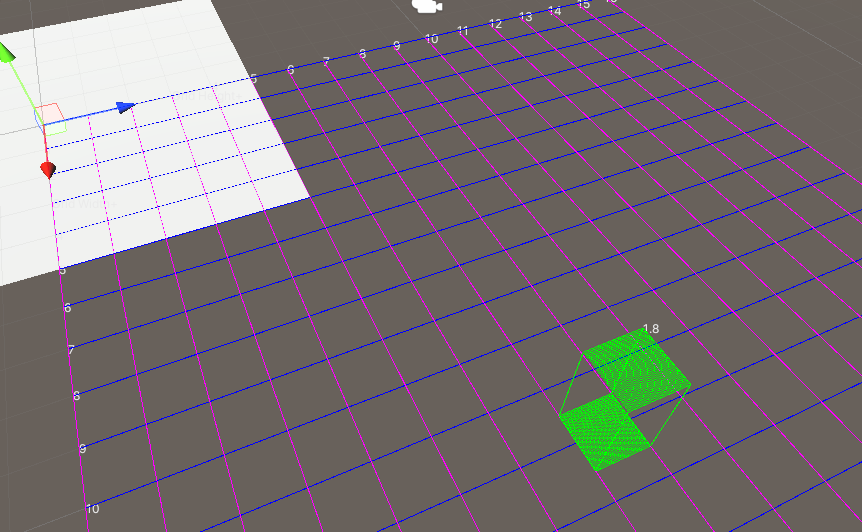
传入一个Transform,Grid Origin,用来指示Grid格点的原点,同时也是OpenCV坐标系(右手坐标系)的原点,为了方便计算,应当将此点设置在标定参照的水平面上(其Unity坐标的Y值应该与chessboardGenerateCenter的Y值相同,我没有测试过不相同会如何)。

正确配置后,Scene场景中会产生辅助线。此图中,蓝色箭头指示右手坐标系下Y轴的正反向,红色箭头指示右手坐标系下X轴的正方向
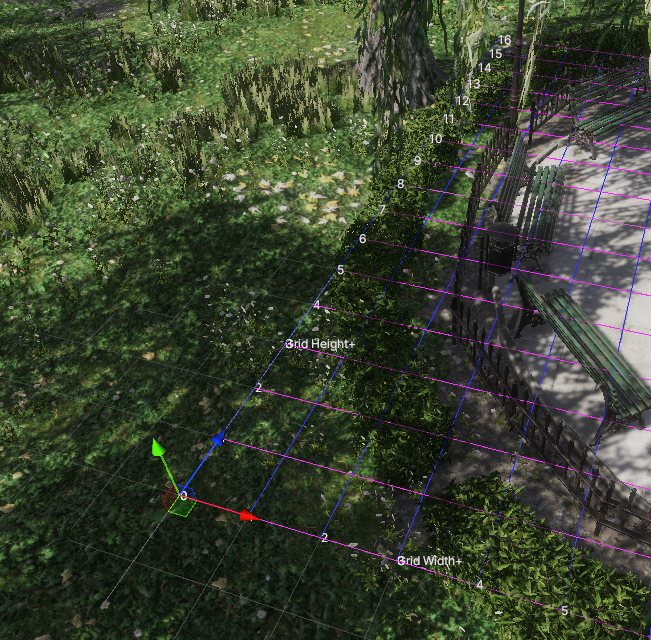
可以通过调节
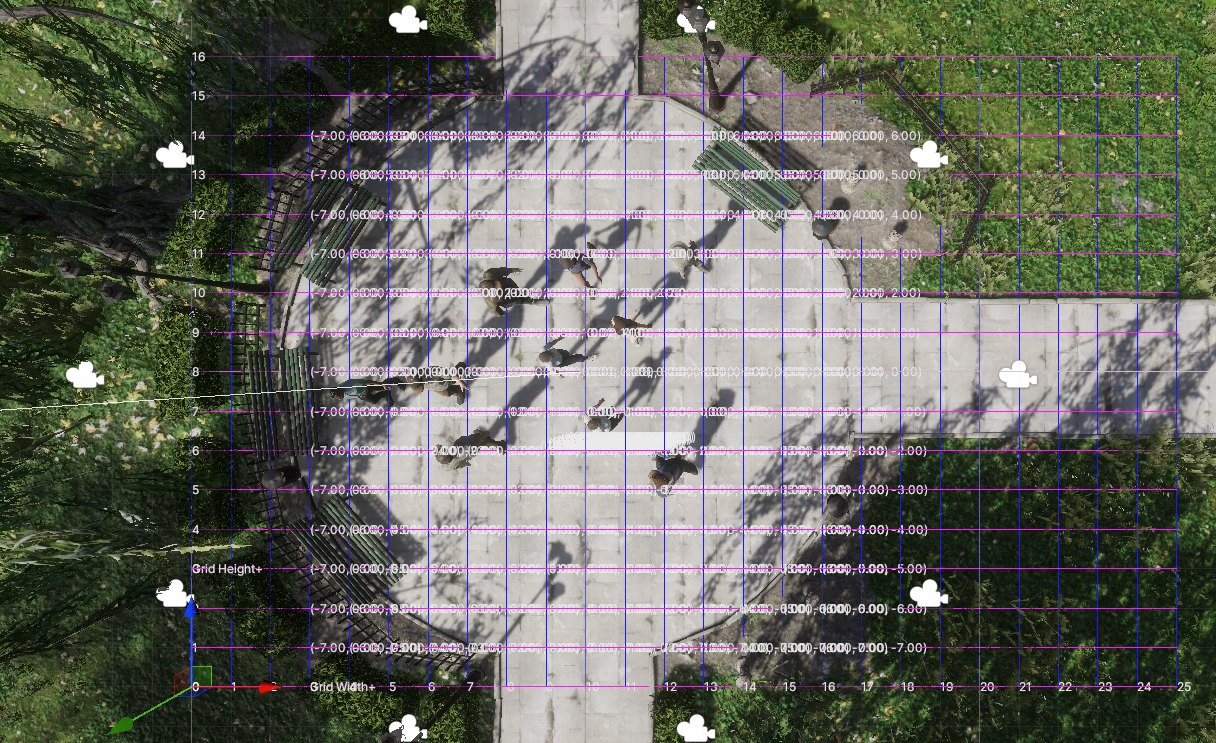
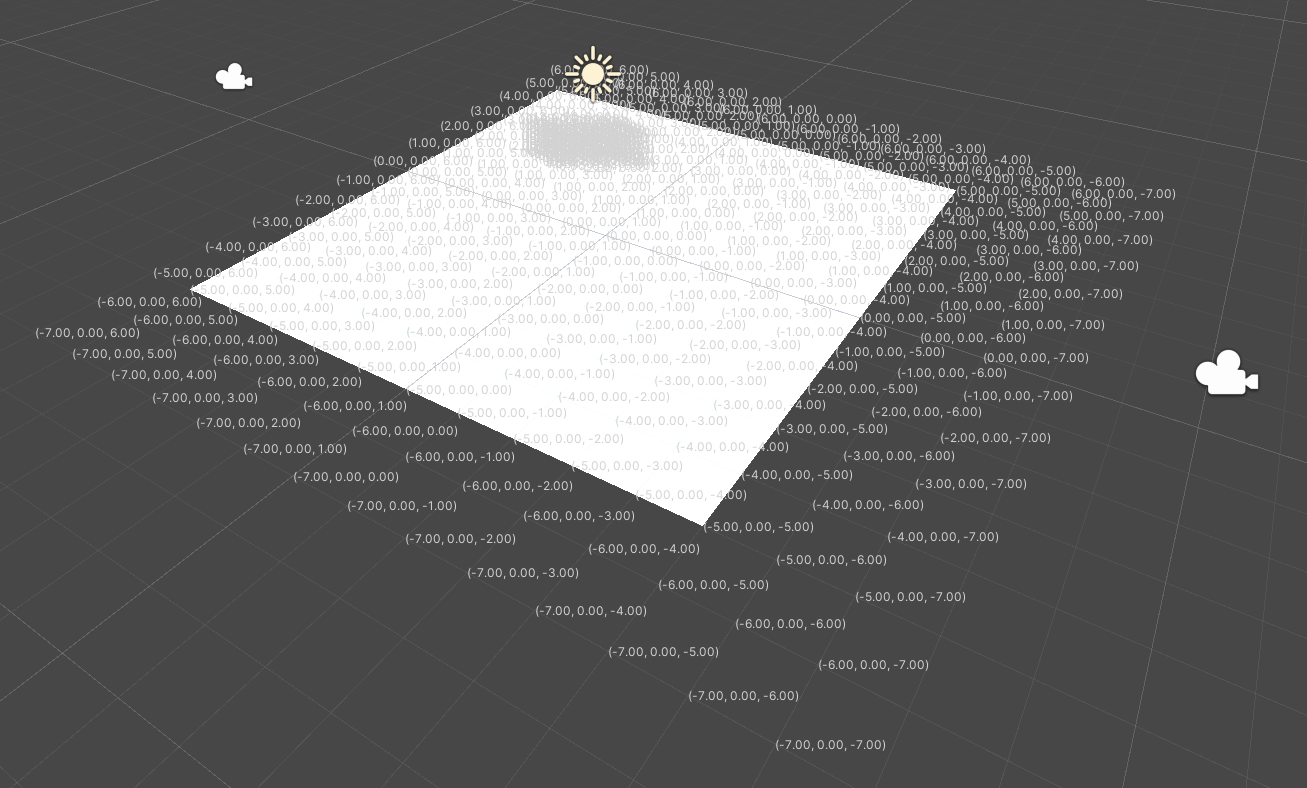
MAP_HEIGHT与MAP_WIDTH来调节格点图的大小,MultivewX只会标注脚底在格点图中的人。默认值16 与 25 是一个合理的值,一般不需要额外改动。例如,当
MAP_HEIGHT = 16,MAP_WIDTH = 8时,标注如图: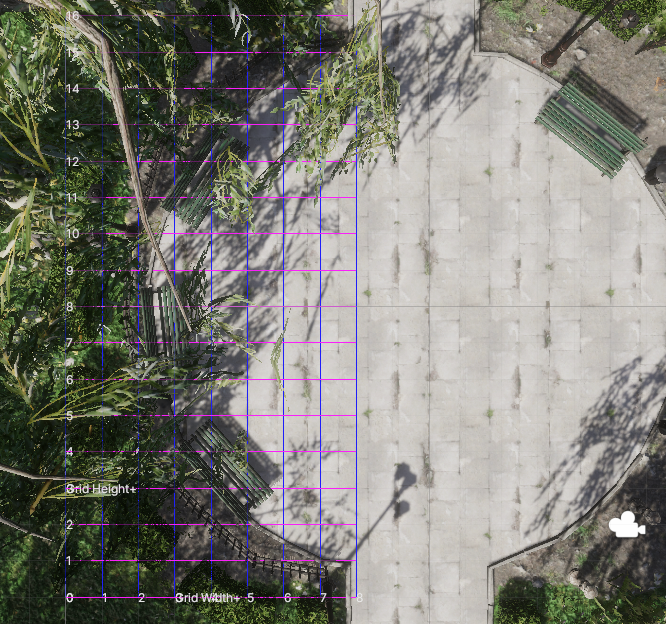

MAP_EXPAND可以理解成每个边长被额外划分多少份(小刻度),改动此项不会改变地图的大小。例如,当
MAP_EXPAND = 40时: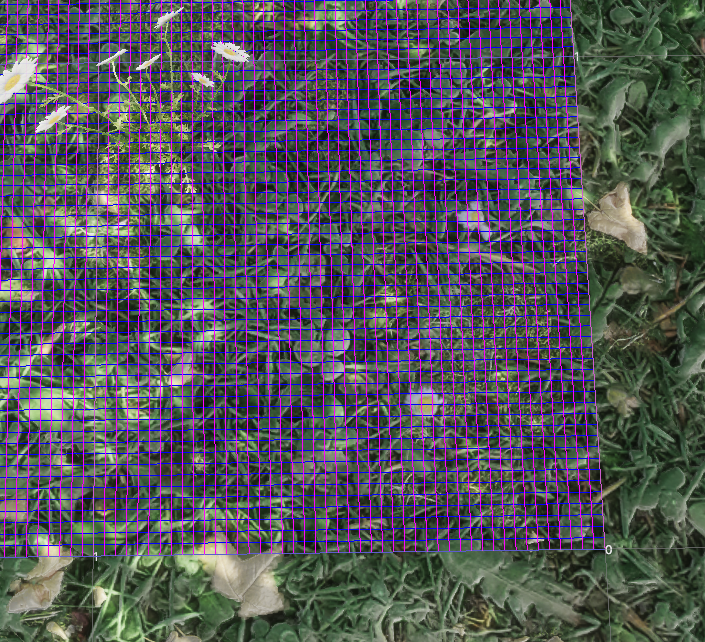
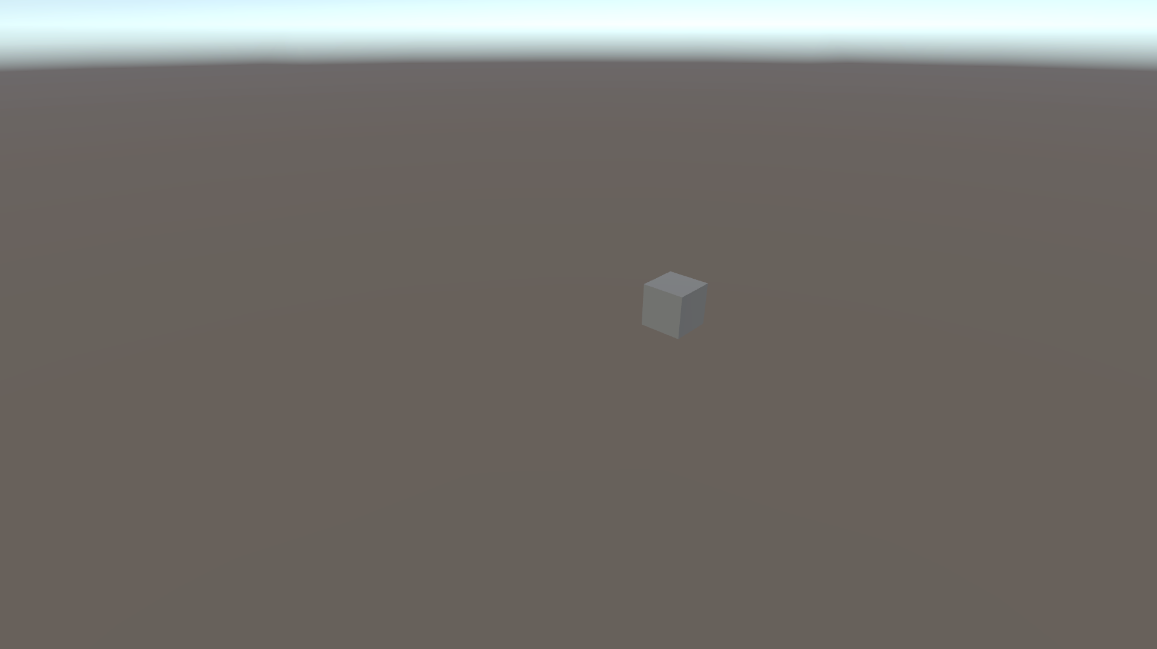
缩放(Scaling)。很多时候,场景素材的地图尺寸和人物模型尺寸是不一样的,往往会存在人物模型与场景的不协调。 下图展示了这种差异,人物模型看起来很小,成年人看起来身高和儿童一样。
 这就导致用户难以一站式完成CalibrateTool的使用,需要自己手动再去调整人物模型或者场景素材,而往往这种调整还牵扯到matchings(MultiviewX接受的一种输入)的坐标变换,每个人实现matchings的方法都不一样,这里提个醒,坐标变换的顺序必须是: 缩放->旋转->平移。
通过调整Scaling参数,CalibrateTool的辅助线与辅助模型(立方体)可以帮助用户很直观的找到一个合理的缩放值。辅助线的每格的边长为右手坐标系下1米。辅助模型的长宽为MAN_RADIUS*2,高为MAN_HEIGHT
一般情况下,其余参数不需要额外设置。如果Python端报错,可以尝试调大
Update Chessboard Interval参数,增加IO读写的时间。运行。
Calibrate
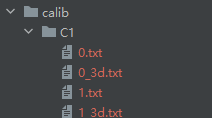
拿到数据后,我们就可以进行标定了,应该会有如下结构:calib文件夹下有 C1 - Cn 子文件夹,每个子文件夹中,有得到的棋盘数据。
运行calibrateCameraByChessboard.py,内外参数分别保存在calibration/intrinsic 和 calibration/extrinsic中。所输出的外参数(对于每一个虚拟的棋盘,都有一个外参负责对应的变换)为对第一个虚拟棋盘的变换,且生成的第一个虚拟棋盘总是与给定的Chessboard Generate Center同面
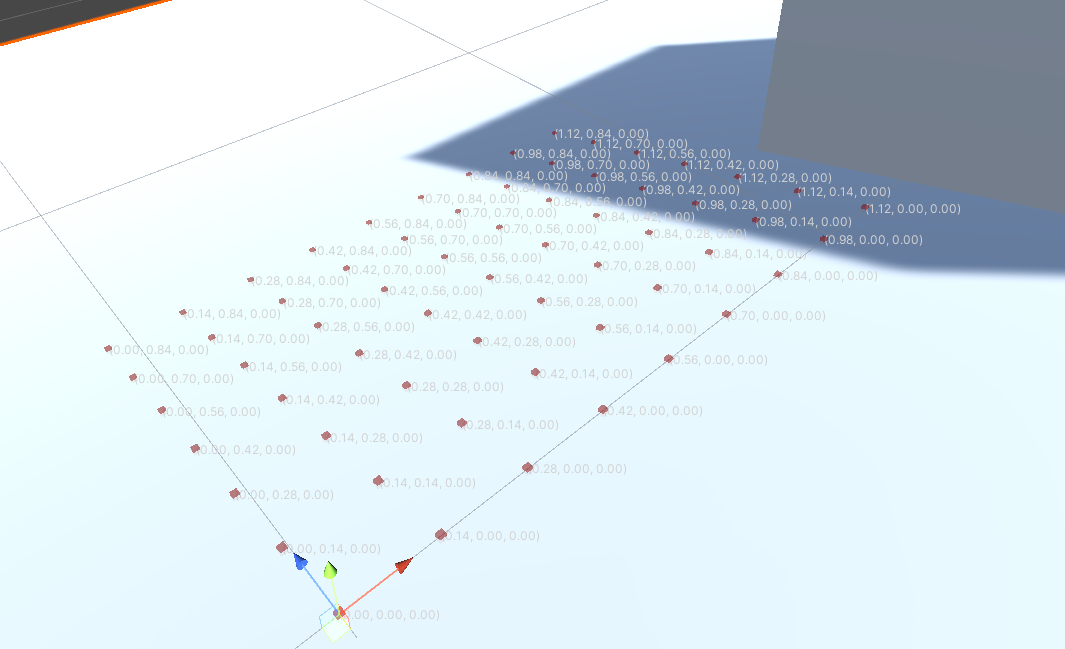
一个疑惑 这种方法中,Python收到的棋盘格的世界坐标是给定的,如上图所示。(0,0,0)总是在左下角 往往在一些相对Chessboard Generate Center物体对称的物体,会有一个很相近的tvec。 因为在单个相机时,相对于该相机描述时,物体总是需要做同样的位移变换。但是在多个相机时,这种描述,依旧是相对单个接受标定的相机。
为了解决上述的疑问,尝试采用了cv2.solvePnP,和一组在待标定(水)平面上的静态的点来得到R与T,目前不支持相对斜面标定外参。
在引入Grid格点的原点的概念时,遇到了一些问题。原思路是直接变换MarkPoints,使得solvePnP ”认识“目标坐标系,但是,经过实验得知,变换MarkPoints时候,应当保证最终被solvePnP获取的(OpenCV中)世界坐标的x,y值,保证其正方向与原 Unity 中x,z正方向保持一致或全部相反。否则会导致后续POM生成失败。猜测是左右手坐标系变换后OpenCV下Y正方向的问题。
Validate
通过参考Unity3d和OpenCV的相机模型、左右手坐标系下三维位姿(旋转、平移)的转换与旋转向量和旋转矩阵的互相转换 python cv2.Rodrigues()得知,默认的 Unity3D 相机组件是一个理想的针孔相机,其内外参可以通过调用Unity3D给予的相关参数计算得出。
GetNativeCalibrationByMath(),给出了这种方法,其结果基于Unity场景下的世界坐标系。经过比较这两个方法获得的值,误差很小,可以认为CalibrateTool是可以合理利用的。
提供了 vali.py,其利用单应性检验标定结果。
Preview
支持动图预览
- 例如,在命令行中输入
python run_all.py -p 15,即可为前15帧生成带标注框的动图预览。
Work with MultiviewX_Perception
请 clone 一份 MultiviewX_Perception,可以参考Notes of MultiviewX_Perception进行后续工作。其将原calibdateCamera.py替换为了calibrateByChessboard.py,添加了一些动态容量的数组以适应不同的摄像头数,支持Scaling缩放,并且datasetParameters将由 CalibrateTool 根据Unity中Inspector面板处的参数自动生成,等等。
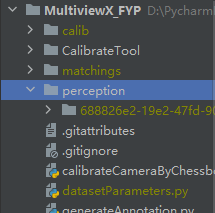
欢迎下载示例文件sample.zip,将其子文件夹calib、perception、matchings,子文件datasetParameters.py拖入到 MultiviewX_Perception 文件夹下。
运行run_all.py,参考Notes of MultiviewX_Perception,其给出了一些常用的命令行参数
1 | python run_all.py |
当用户仅仅需要标定与生成POM时候(仅仅提供calib、datasetParameters.py),可以输入参数-f:
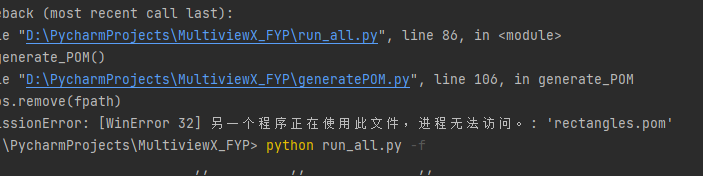
1 | python run_all.py -f |
如果遇到WinError 32 报错,请检查是否有相关程序正在使用.pom,在PyCharm中,可能不小心打开了.pom的预览窗口,请关闭。
示例 datasetParameters.py (for Wildtrack):
1 | GRID_ORIGIN = [-14.91,-1.51,-5.43] |